Adding Storage to a VM
How to create and attach an empty disk to a deployed VM.
Intel Nodes Only
This guide is applicable to VMs deployed on Intel nodes only. Read more about Apple ARM-based Support to see which commands and options are supported for VMs deployed on Apple ARM-based nodes.
You can attach a disk to a VM configuration or a VM to increase its storage. This page discusses the attach disk workflow in the Orka CLI. For more information about attaching a disk with the Orka API, see Orka API Reference: Attach disk.
You can attach a disk to:
Quick command summary
orka image generate
orka vm [create-config / create / deploy]
orka vm status
orka vm attach-disk
orka vm [stop / start]
How does attached storage work
When you attach a disk, you are referencing a non-bootable base image from the Orka image storage. Orka needs to preserve the state of its base images. To achieve this, the attach disk functionality creates an independent volume copy of the specified base image and attaches it to the VM. The base image becomes detached and the volume copy automatically persists as long as the respective VM lives. Your VM writes any changes to its independent writable copy and the initial base image remains unchanged.
To trigger this process, you need to shut down and restart the VM. After this initial restart that activates the attached storage, there is a 20-30 seconds delay created by the operating system. During that time, any new data intended for the added storage is stored in the RAM.
After the base image is detached, you can attach it to another VM.
Current limitations
- You can attach only non-bootable storage disks created with
orka image generate, uploaded withorka image uploador pulled from the remote repo withorka image pull. - You cannot save any changes made to an attached storage to the originating base image in the Orka image storage.
- You cannot create a new image from an attached storage.
Step 1: Create an empty disk
Generate an empty, unformatted disk of а specified size:
orka image generate

OR

orka image generate --image <IMAGE.img> --size <SIZE> -y
Make sure to set the .img file extension for the image name.
You can set the size in k (kilobytes), M (megabytes), G (gigabytes), or T (terabytes).

Orka lists an unexpected size?
If you run
orka image list, Orka lists generated empty storage disks with a fixed size of ~192k. When attached to a VM and formatted, the disk will appear with its correct size in the VM.
Step 2a: Attach the disk (VM configuration)
You can create a VM configuration with a disk already attached to it. When running orka vm deploy in interactive mode, Orka will automatically populate the Attached disk field and will attach your disk. However, in direct mode, you need to attach the disk again with the --disk flag.
- To create the VM configuration with an attached disk, run:
orka vm create-config

OR

orka vm create-config -v <NAME> -b <BASE_IMAGE> -c <CPU_COUNT> -C <vCPU_COUNT> -d <ADDITIONAL_IMAGE> -y
When prompted, provide the required information. Under [Attach Disk] set the name of the disk that you want to attach.

- When deploying the VM configuration, make sure that Orka has pre-populated the
[Attached disk]field with the name of the disk as specified in the VM configuration.
orka vm deploy

OR

orka vm deploy -v <NAME> -y

Step 2b: Attach the disk (VM creation)
You can attach a disk during the creation of a VM with orka vm create.
orka vm create

OR

orka vm create -v <NAME> -b <IMAGE> -c <CPU_COUNT> -C <vCPU_COUNT> -d <ADDITIONAL_IMAGE> -y
When prompted, provide the required information and set [Attach Disk] to the name of the empty image that you want to attach.
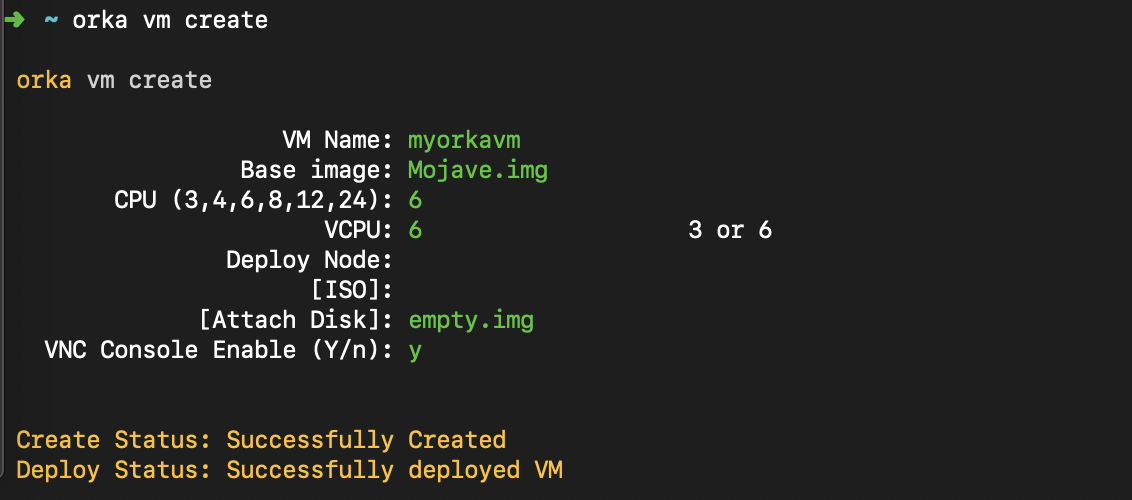
Although Orka does not prompt you to restart, make sure to go to Step 3 in this tutorial and restart.
Step 2c: Attach the disk (VM deployment)
To attach a disk to a VM during its deployment, run:
orka vm deploy -v <NAME> -y
When prompted, provide the required information and set [Attach Disk] to the name of the empty image that you want to attach.

Step 2d: Attach the disk (existing VM)
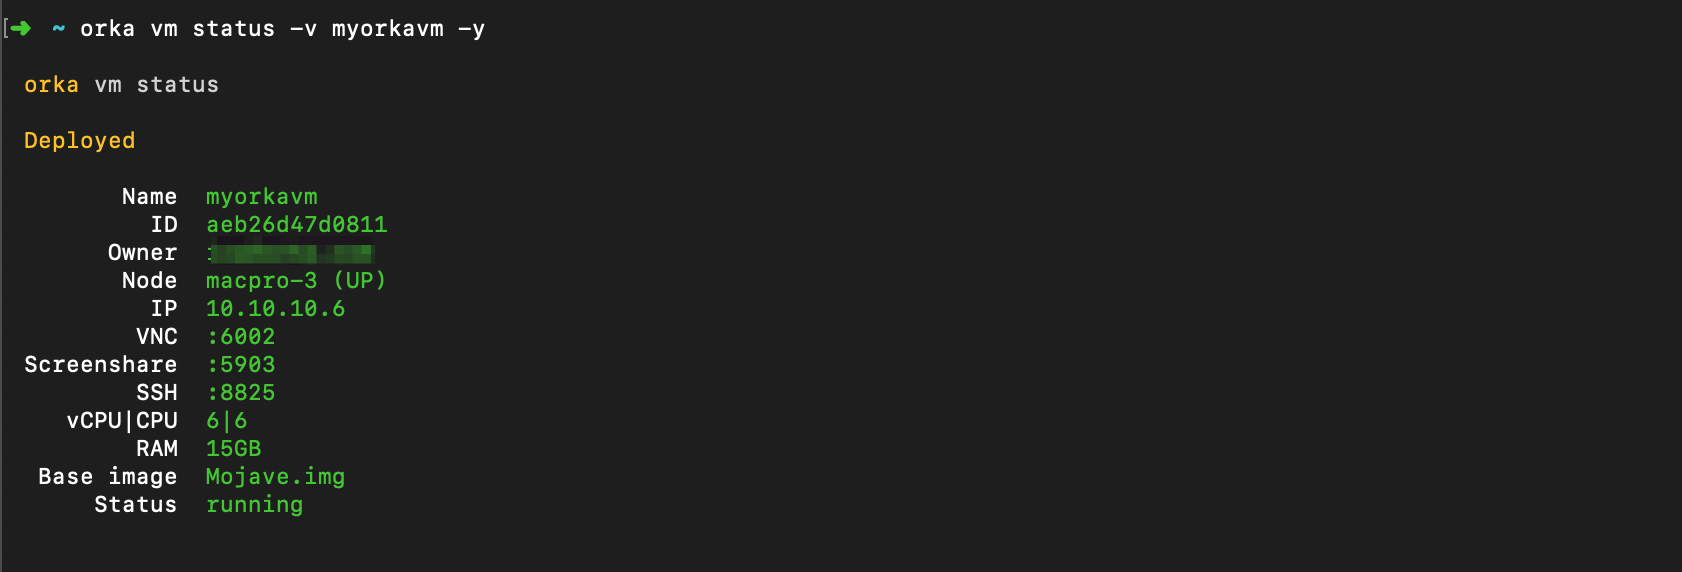
When attaching a disk to a VM, you need to specify the VM by ID.
- To get the ID of the VM, run:
orka vm status -v <VM NAME> -y
Replace <VM NAME> with the name of your VM.
- To attach the newly created empty storage, run:
orka vm attach-disk

OR

orka vm attach-disk -v <VM_ID> -i <IMAGE> -y

OR if the default mount point is already in use

orka vm attach-disk -v <VM_ID> -m <MOUNT_POINT> -i <IMAGE> -y
Provide the VM ID and the name of the empty storage. If you've attached any other disks to this VM previously, increment the last letter of the suggested mount point as needed. (For example, if this is your first attached disk for this VM, the mount point is sdc. If this is your third attached disk, the mount point is sde.)

Step 3: Restart the VM
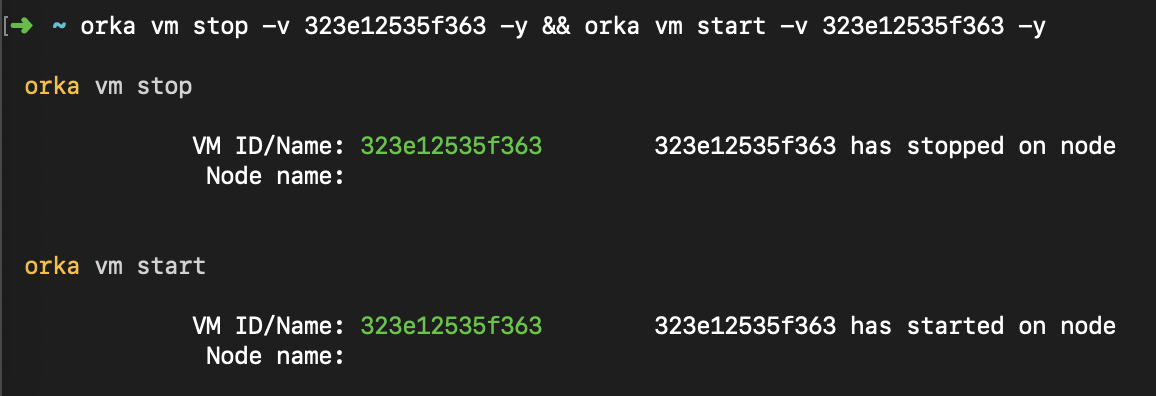
As prompted by the Orka CLI, you need to restart your VM for it to recognize the attached disk.
Make sure that you've completed the OS setup of your VM before you proceed.
Power off and then power back on the VM from the command line. Run the following commands separately:
orka vm stop -v <VM ID> -y && orka vm start <VM ID> -y
Replace <VM ID> with the ID of your VM as listed by orka vm status -v <VM NAME> -y VM by ID.
Step 4: Format the disk
Orka creates unformatted storage. Your VM recognizes that there's storage attached but it needs to format it to be able to work with it.
You can format the disk by connecting to your VM via VNC and then following the OS prompts.
- To establish a VNC connection to your VM, you first need to get the VM's IP and VNC port:
orka vm status -v <VM NAME> -y
Replace <VM NAME> with the name of your VM.
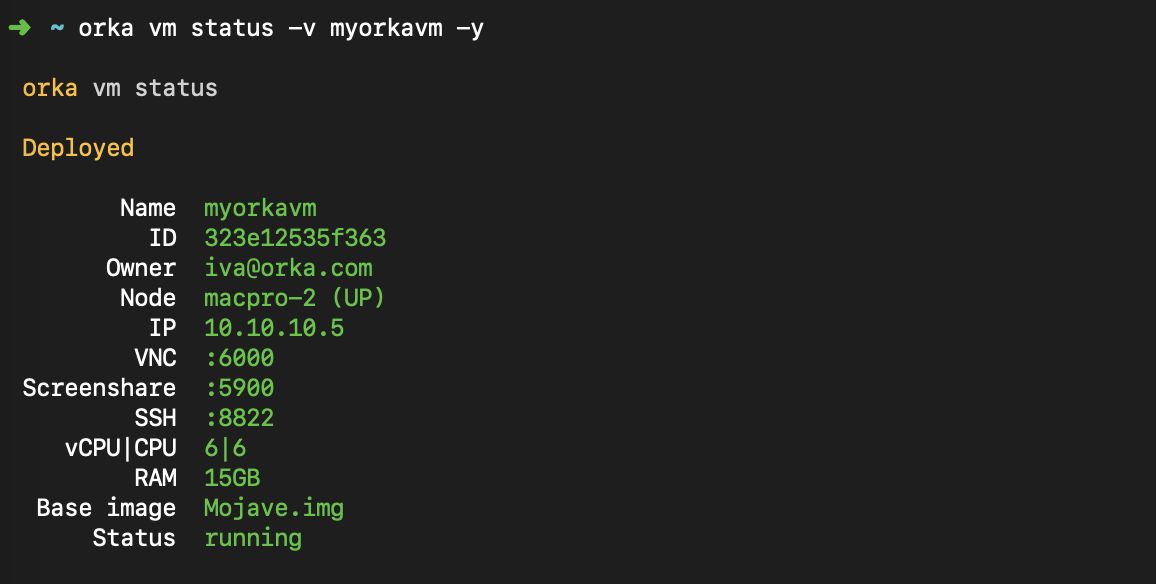
- Launch your VNC client and provide the VM's IP and VNC port. When prompted that the disk is unreadable, click Initialize.
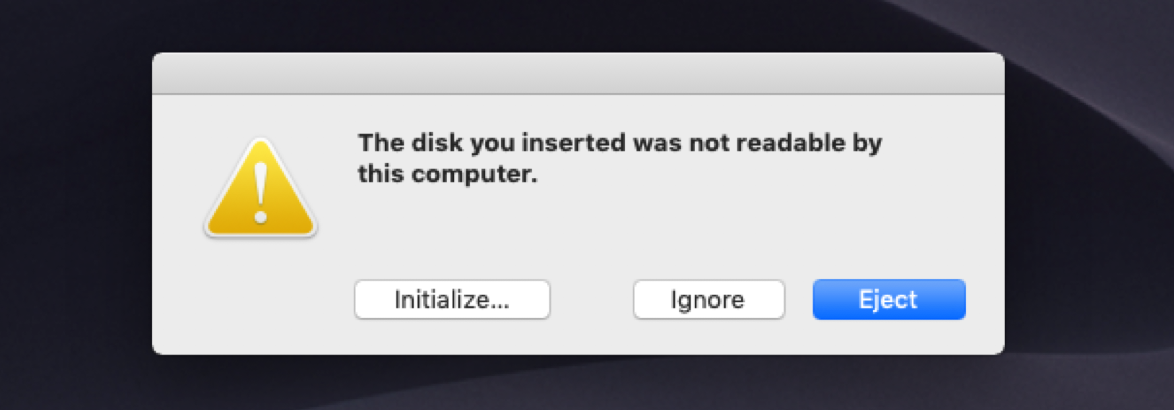
TIP: Not seeing this prompt?
Restart the VM from the OS.
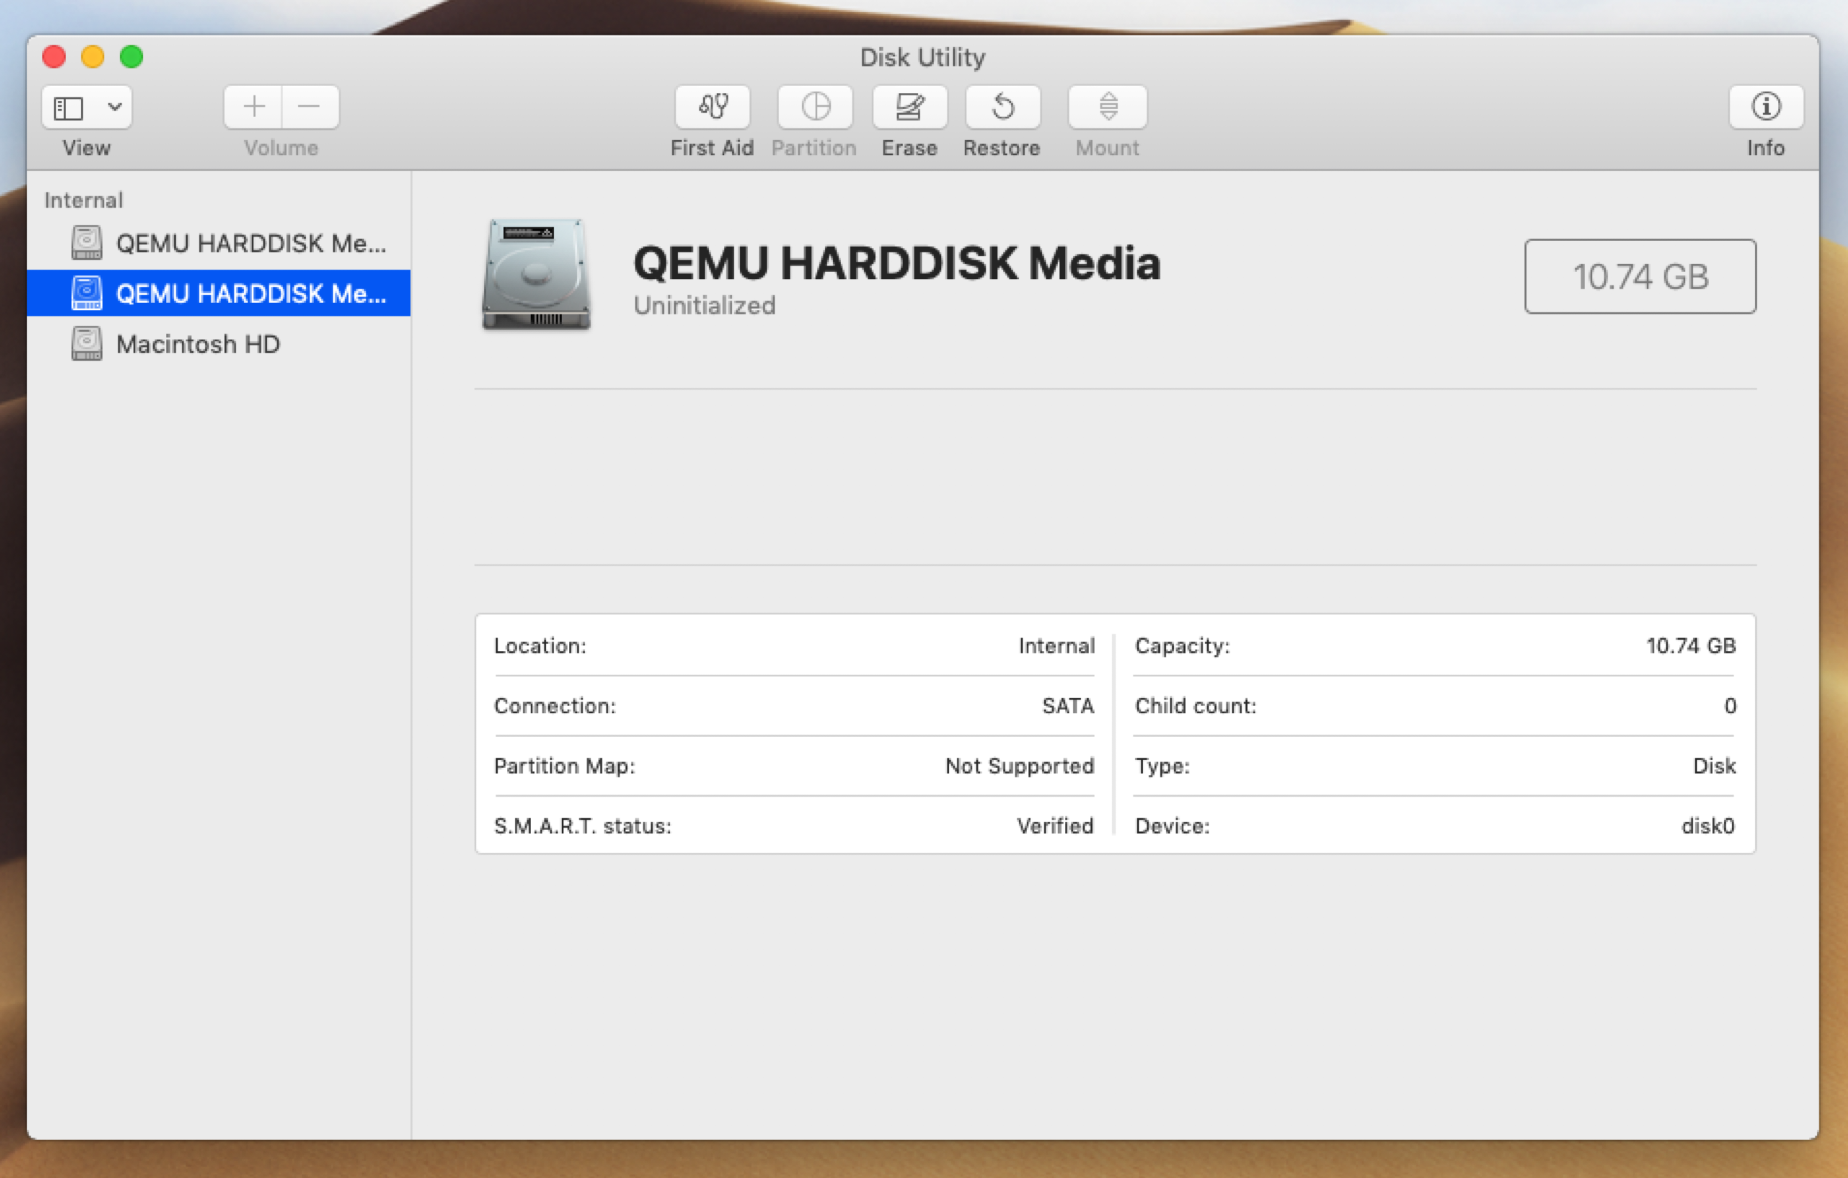
- In the Disk Utility dialog, select the disk that matches the size of the one you created and click Erase.
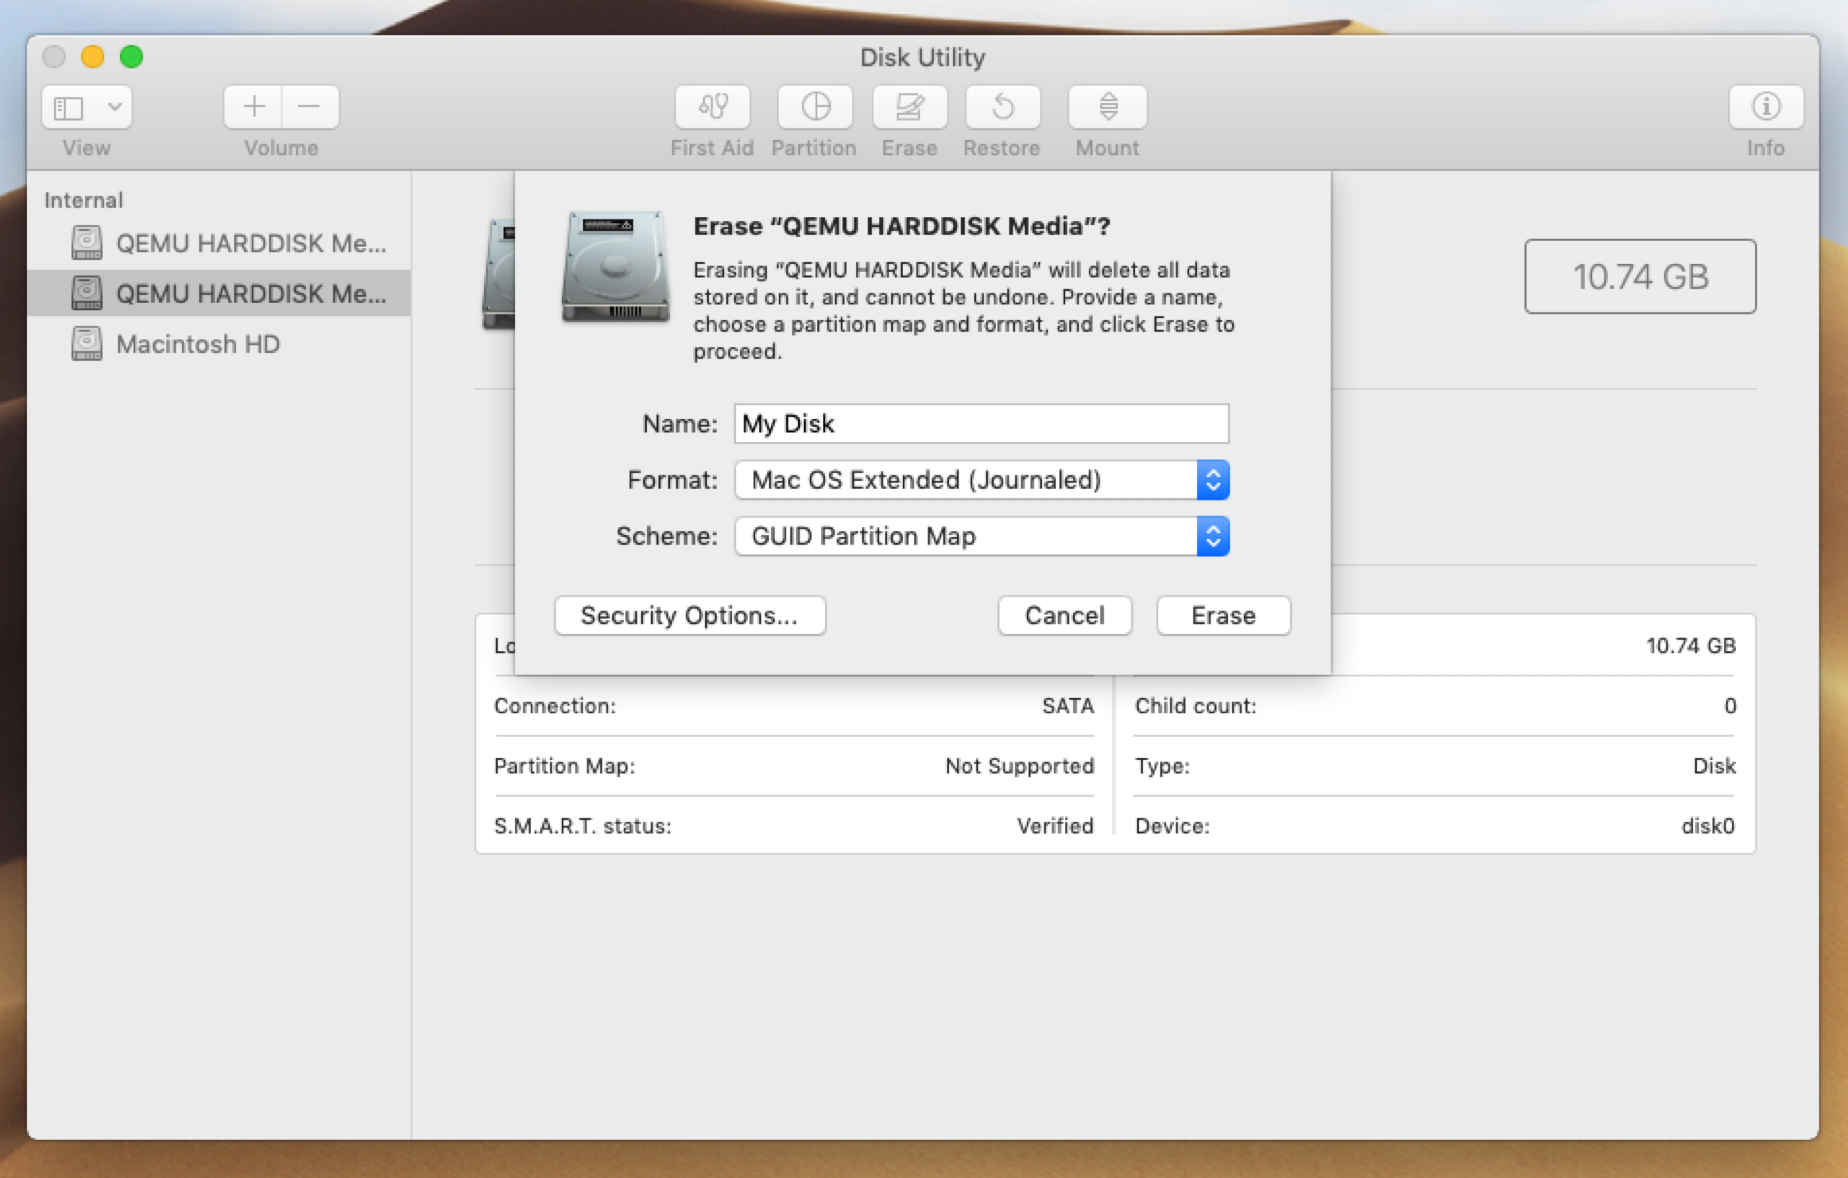
- Set a name, configure the format and scheme settings, and click Erase.
- When the operation completes, click Done and close the Disk Utility.
Your empty storage is now available for use.
Updated almost 2 years ago
