Burst
Orka Burst provides users with dedicated, on-demand access to elastic cluster capacity when needed.
Overview
Orka Burst provides users with dedicated, on-demand access to elastic cluster capacity when needed. It's designed to grow your cluster size during heavy workloads, without the commitment of annual contracts. When required, you'll then be able to enable burst capacity directly from your MacStadium Admin Portal.
Orka Burst is set up contractually, requiring a small non-impacting maintenance window to provision and configure the nodes before using Burst for the first time. The client will be made aware of which nodes are burst nodes in your IP Plan, available in the MacStadium account portal. It is the client's responsibility to tag or namespace these nodes for scheduling, tracking, and other related tasks.
After the initial setup is complete, these additional dedicated Orka Burst nodes will be available for your use within 15 minutes, billed only for the time used. Contact your MacStadium Account team to set up Orka Burst for your instance.
Key Concepts
- A burst node (or node) is a node that is available to customers on a contractual basis for use during periods of high workload, in addition to their existing nodes.
- Administrators are the only user-based roles with access to start and stop burst nodes within the MacStadium Portal.
- Orka Burst is manually started and stopped by an admin user through the MacStadium Admin Portal.
- Clients cannot interact directly outside of the client space within their Kubernetes cluster. This means that specific commands for Kubernetes node management are unavailable due to security reasons.
- In Orka, the tagging function is similar to labels. Tags can be used for monitoring in Prometheus or a similar tool if you are using the
kube-node-labelsmetric.
First Time Setup
- Contact the MacStadium sales team to enable Orka Burst on your cluster.
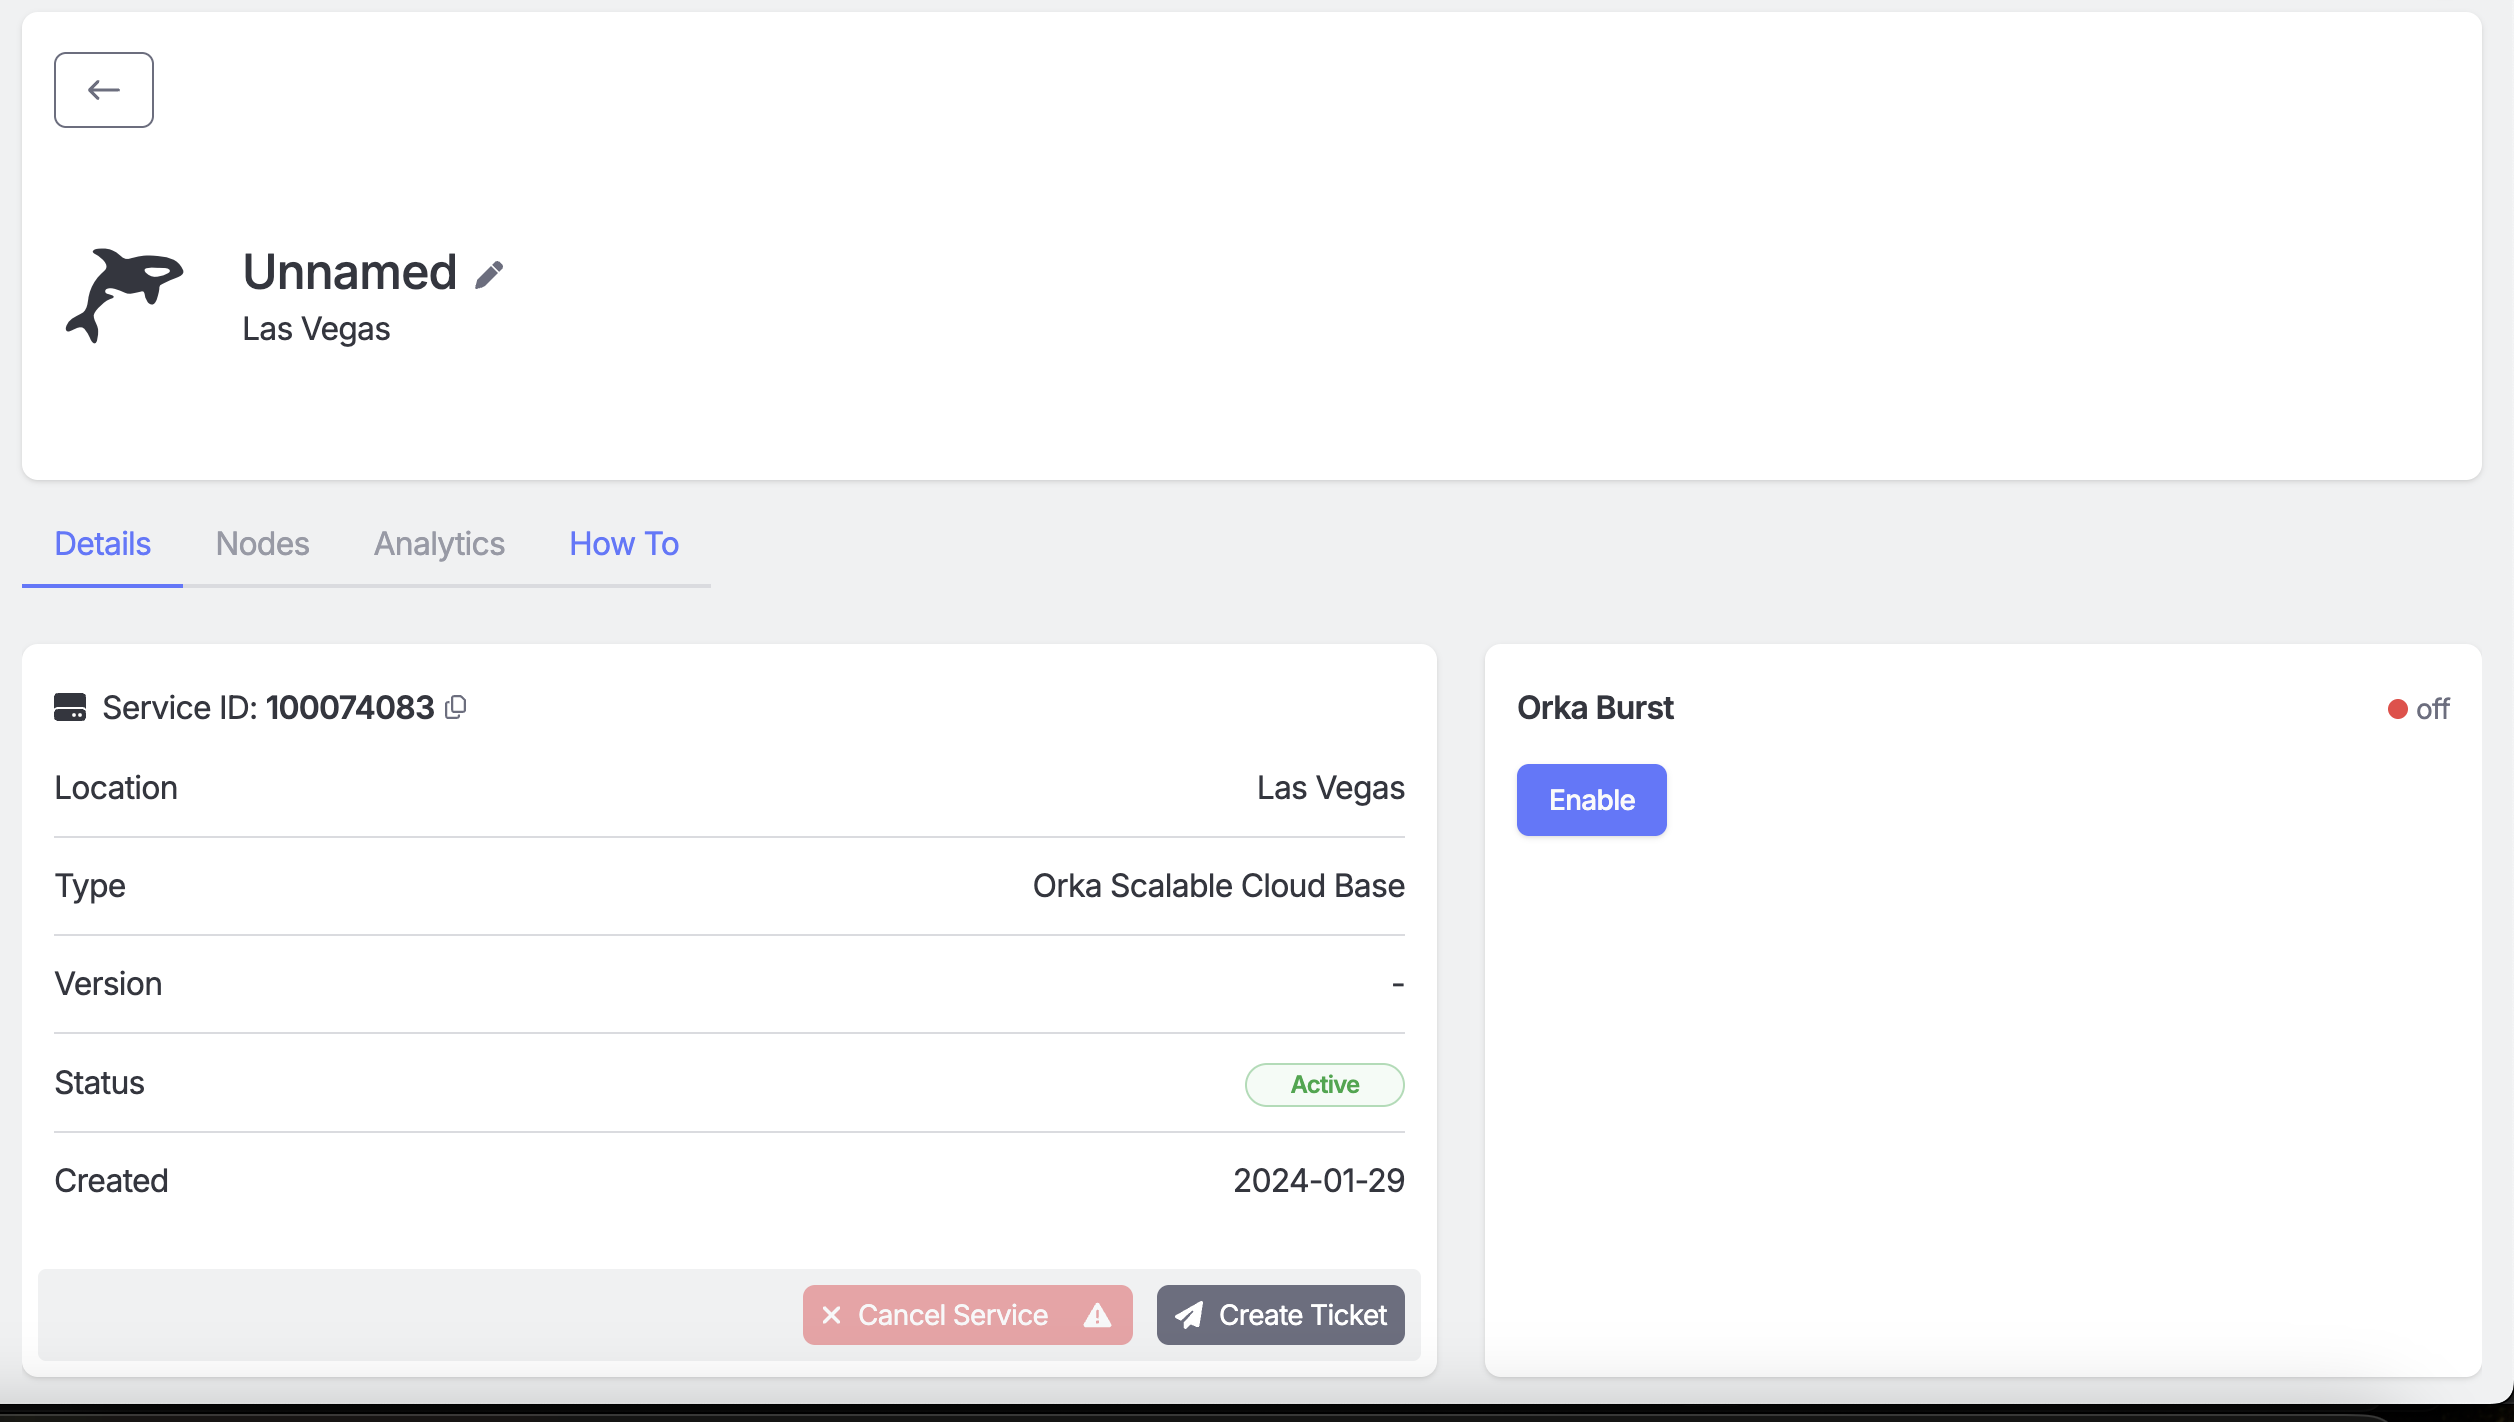
- Any user with an admin-based role can log in to your MacStadium Portal.
- Click the toggle that says ‘Enable Burst’.
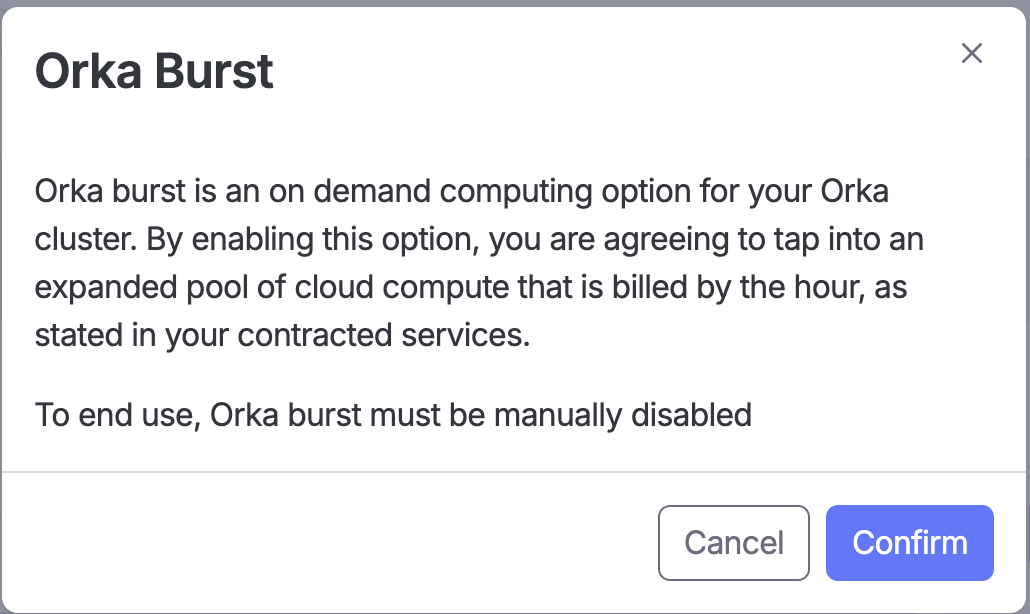
- Click ‘Confirm’ to accept the use of the contracted service Orka Burst.
- When all scheduled burst workloads have completed and no remaining CI jobs are scheduled on burst runners, manually drain the Orka Burst nodes and move them to a different namespace.
- After the empty Orka Burst nodes have been successfully moved to a different namespace, navigate back to the Macstadium Portal and click ‘Disable Burst’.
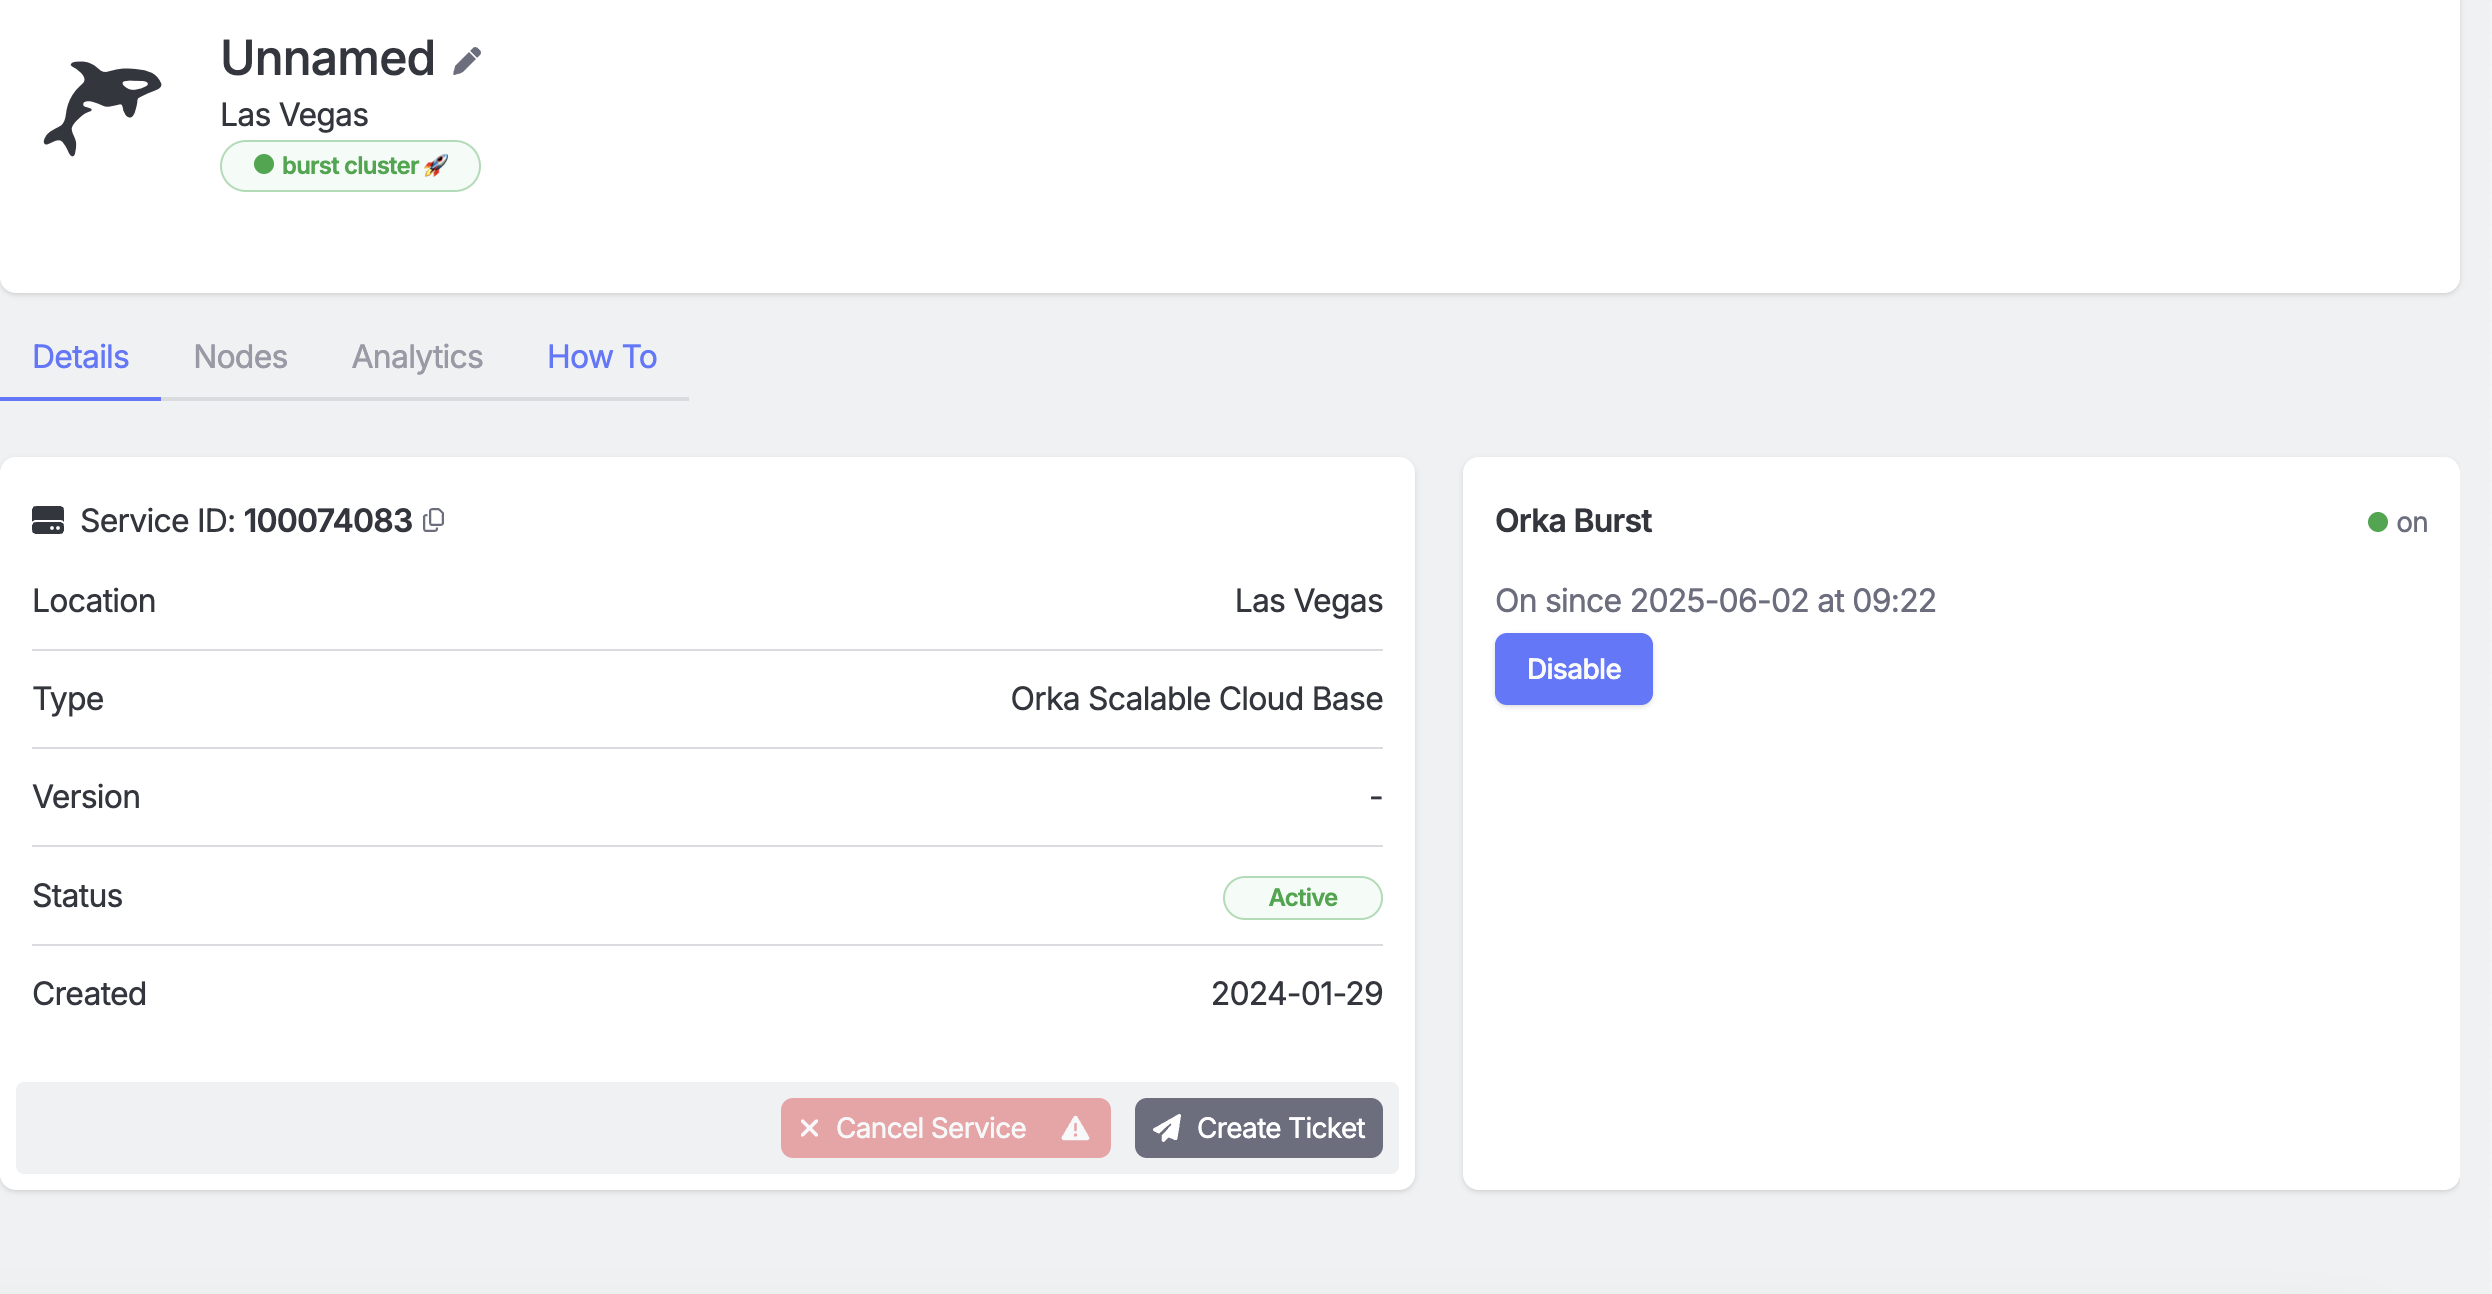
Enable/Disable Orka Burst
Enable Orka Burst
After your Orka is configured with burst nodes by MacStadium’s support team, administrative users can turn them on or off via the portal. When Burst is enabled, the nodes are powered on and added to the cluster. This operation should take no more than 15 minutes. Once added to the cluster, they can be scheduled for workloads.
Disable Orka Burst
Important Note
Orka Burst has no knowledge of currently scheduled workloads, and as a result, any currently running jobs will fail and need to be rescheduled by the calling applications. You may need to clean up failed workloads if the nodes are executing when Orka Burst is being disabled.
Orka Burst has no knowledge of currently scheduled workloads, and as a result, any currently running jobs will fail and need to be rescheduled by the preferred scheduler controller. You may need to clean up failed workloads if the scheduled workloads are executing on disabled burst nodes, as Orka Burst is being disabled.
When Burst is disabled, the nodes are powered down and removed from the cluster.
If your burst nodes are in the same Namespace as your normal Orka nodes, we recommend moving them to a separate Namespace before disabling Orka Burst. Moving a dedicated namespace allows the node to be sandboxed, so you can sequester it and ensure that no additional workloads will be scheduled on it. The client is responsible for monitoring the usage of your burst nodes and moving nodes when a workload is not being run against them. Once your cluster has passed its highest peak of utilization, work with your engineering team to identify a period of low resource utilization to start moving burst machines to a separate namespace that aren’t running builds.
Removing Failing Workloads
If you’ve not waited for workloads to clear before shutting down nodes, you may experience errors in your CI pipeline. Follow these steps to troubleshoot failing workloads in your Orka Burst cluster:
Note: Only users with Admin privileges can interact with the Orka Burst cluster.
- Identify the failing workload, use
kubectl get <RESOURCE> --namespace=<NAMESPACE>to view the status of pods within a specific workload. Look for pods with CrashLoopBackoff, Failed, or Error status. - Delete the workloads using
kubectl delete <node name>- Graceful deletion.
You can use the container lifecyclepreStophook to have pods sleep before termination. This hook is executed prior to kubectl sending theSIGTERMcommand to you container. - Forced deletion.
- Graceful deletion.
- Workload cleanup.
Updated 2 months ago